Mounting the CAMlot onto the ScorPi
A) Disassembling the cap screw fixing of the ScorPi
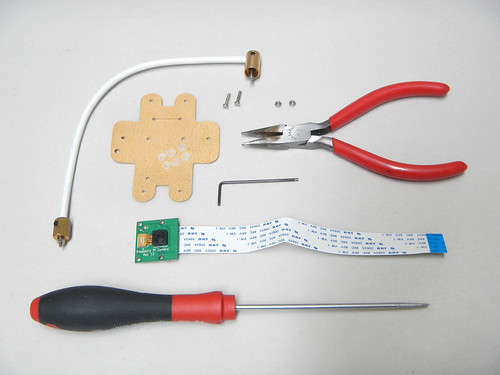
In order to attach the ScorPi on the base of the CAMlot, you will have to dismantle the fixing connector of the ScorPi. For this step you will need :
- 1 ScorPi camera mount
- 1 Hex key 1.5mm
- 1 Flat head screwdriver
- 1 Long-nosed pliers
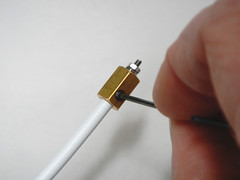
- Release the fixing connector from the gooseneck tube by loosen the socket set screws with the hex key
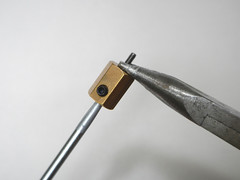
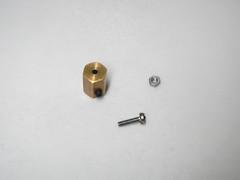
- Take out the top nut from the cap screw
- Access to the cap screw head inside the brass connector and hold it with the screwdriver
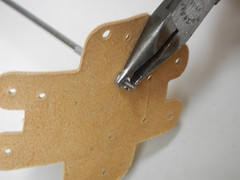
- Unfasten the nut with the pliers
- Take out the nut and the M2X8 cap screw from the brass connector

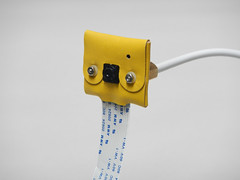
B) Assembling the ScorPi connector with the base of the CAMlot
For this step you will need :
- 1 Leather cut out of the CAMlot
- 2 M2X10 Cap Screws
- 2 M2 Nuts
- 4 M2 Nylon washers
- 1 Flat head screwdriver
- 1 Long-nosed pliers
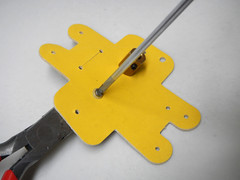
- Insert the M2X10 cap screw of the CAMlot through the backside of the brass connector
- Mount one nylon washer on top of the brass through the cap screw
- Insert the set through one of the backside mounting holes of the leather cut out
- Mount one nylon washer on top of the leather and secure with a nut
- Hold the cap screw with the screwdriver and fasten the nut gently with the pliers
- Mount one nylon washer on the second M2X10 cap screw
- Insert the sets through the second backside mounting holes of the leather cut out
- Hold the cap screw with the screwdriver and fasten the nut gently with the pliers
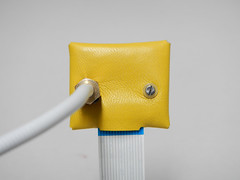
In order to mount the Raspberry Pi Camera on the assembly and close the CAMlot, follow step B and C of the assembling instruction of the CAMlot