Assembling the CAMlot
A) Mounting the base of the CAMlot
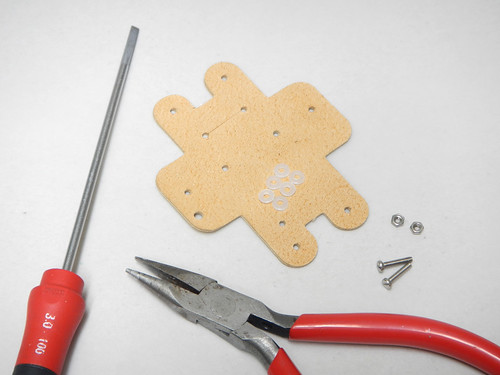
For this step you will need :
- 1 Leather cut out
- 2 M2X10 Cap screws
- 2 M2 Nuts
- 4 M2 Nylon washers
- 1 Flat head screwdriver
- 1 Long-nosed pliers
- Take two M2X10 cap screws with nylon washers and insert the sets through the backside mounting holes of the leather cut out
- Mount one nylon washer on top of each cap screw and secure with one nut on each
- Hold the cap screws with the screwdriver and fasten the nuts gently with the pliers


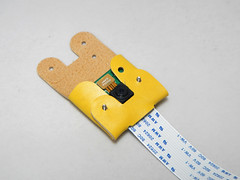
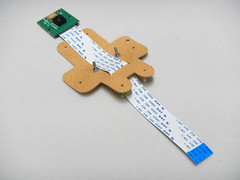
B) Fixing the Raspberry Pi Camera onto the base
For this step you will need :
- 1 Base of the CAMlot mounted in step A
- 1 Raspberry Pi Camera board
- 2 M2 Nuts
- 2 M2 Nylon washers
- 1 Flat head screwdriver
- 1 Long-nosed pliers
- Push the ribbon cable of the Raspberry Pi Camera through the bottom slot of the leather cut out
- Mount the Raspberry Pi Camera onto the base through the two bottom mounting holes of the board
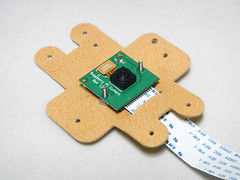
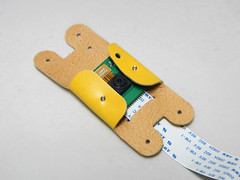
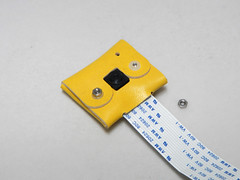
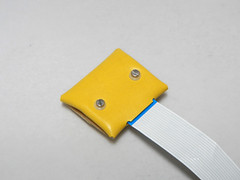
B) Closing the CAMlot
For this step you will need :
- 2 M2 Nuts
- 2 M2 Nylon washers
- 1 Flat head screwdriver
- 1 Long-nosed pliers
- Close the two side flaps on top of the cap screws and hold them in place with your fingers
- Close the bottom flap on top of the cap screws and hold it with your fingers
- Close the top flap on top of the cap screws and hold it with your fingers
- Mount one nylon washer on top of each cap screw and secure with one nut on each
- Hold the cap screws with the screwdriver and fasten the nuts gently with the pliers